Brussels sprouts are a nutritious, cold-weather crop that thrives in cooler temperatures, making them an ideal vegetable to grow at home.
With their unique miniature-cabbage-like appearance and mild, nutty flavor, they’re a great addition to any vegetable garden.
While growing Brussels sprouts requires a bit of patience, the reward of harvesting your own fresh, homegrown sprouts makes the effort worthwhile.
This guide covers everything you need to know about growing Brussels sprouts, including the best tips and tricks to ensure a bountiful harvest.
Why Grow Brussels Sprouts at Home?
Homegrown Brussels sprouts taste sweeter and fresher than store-bought varieties, especially after being touched by frost.
Growing them yourself ensures you avoid pesticides and gives you full control over the quality and timing of your harvest. Plus, Brussels sprouts are rich in vitamins C, K, and fiber, adding essential nutrients to your diet.
When to Plant Brussels Sprouts
Brussels sprouts are a cool-season crop that grows best in temperatures between 45°F and 75°F (7°C – 24°C).
They take between 80 to 100 days to mature, so timing is essential to avoid hot weather, which can hinder their development.
Planting Timeline:
- In cool climates: Start seeds indoors 6-8 weeks before the last frost and transplant outside once the soil warms.
- In warmer climates: Plant Brussels sprouts in late summer to harvest in the fall or winter. Frost actually improves the flavor of the sprouts.
How to Grow Brussels Sprouts: Step-by-Step Guide
1. Choose the Right Variety
There are several varieties of Brussels sprouts to choose from. Some popular ones include:
- ‘Long Island Improved’ – A compact, early-maturing variety.
- ‘Jade Cross’ – Known for heat tolerance and disease resistance.
- ‘Redarling’ – Produces beautiful red sprouts with a sweet flavor.
2. Prepare the Soil
Brussels sprouts thrive in well-draining, nutrient-rich soil. They prefer a slightly acidic to neutral pH range of 6.0 to 7.0.
- Amend the soil with compost or well-rotted manure to ensure it is rich in organic matter.
- Adding a balanced fertilizer (10-10-10) before planting helps promote healthy growth.
3. Start Seeds Indoors
- Sow seeds ¼ to ½ inch deep in seed trays or small pots.
- Keep the soil moist and place the trays in a bright, sunny location or under grow lights.
- Germination occurs within 5-7 days at room temperature.
4. Transplanting Outdoors
- Transplant seedlings into the garden when they are about 4-6 inches tall and after the risk of frost has passed.
- Space the plants 18-24 inches apart in rows, with rows spaced about 2-3 feet apart.
- Water thoroughly after planting to help the plants settle in.
5. Watering Requirements
- Brussels sprouts need consistent moisture—water deeply once or twice a week to keep the soil evenly moist.
- Avoid overwatering, as soggy soil can lead to root rot. Mulch around the base of the plants to retain moisture and suppress weeds.
6. Fertilizing for Best Results
- Apply a nitrogen-rich fertilizer 4 weeks after planting to support leafy growth.
- Once sprouts begin forming along the stem, switch to a balanced fertilizer to encourage sprout development.
7. Provide Support
Brussels sprouts grow tall and can become top-heavy as the sprouts mature. To prevent the plants from falling over:
- Use stakes or cages to support the main stems.
- Mound soil around the base of the plant to improve stability.
8. Pruning the Lower Leaves
As the plants grow, remove the lower leaves from the stem to encourage air circulation and prevent disease. This also directs the plant’s energy toward developing sprouts.
Common Problems When Growing Brussels Sprouts (And How to Fix Them)
1. Cabbage Worms and Aphids
Pests like cabbage worms and aphids love Brussels sprouts.
- Solution: Use row covers to protect young plants and handpick worms if you see them. Apply insecticidal soap for aphids.
2. Bolting (Going to Seed)
If temperatures become too warm, the plant may bolt, or go to seed.
- Solution: Plant at the right time to avoid heat, and provide shade if temperatures rise unexpectedly.
3. Poor Sprout Development
Sprouts that remain small or loose can result from lack of nutrients or inconsistent watering.
- Solution: Fertilize appropriately and keep the soil consistently moist.
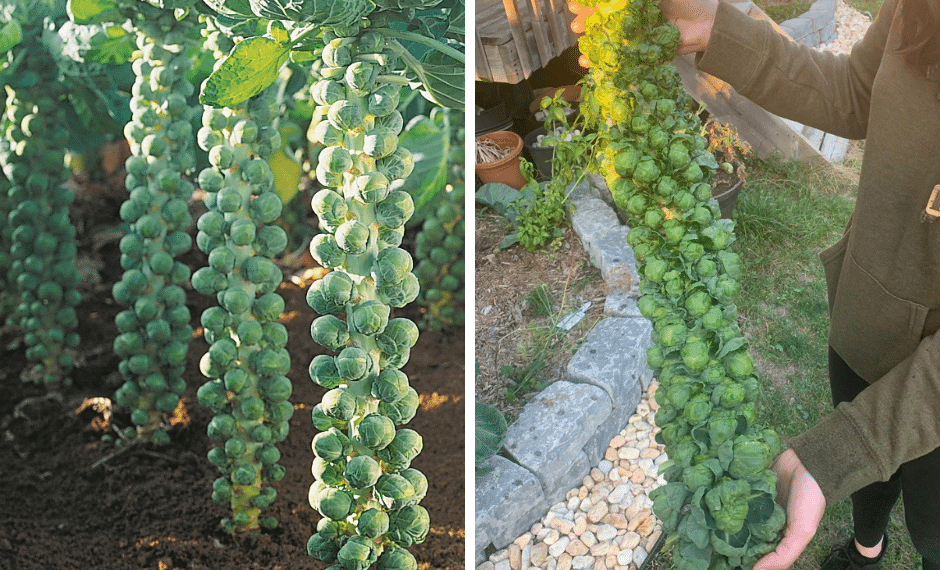
When and How to Harvest Brussels Sprouts
Brussels sprouts are ready to harvest when they are 1-2 inches in diameter and firm to the touch. Start from the bottom of the plant, where the sprouts mature first, and work your way up.
- Twist or snap off the mature sprouts from the stem.
- You can harvest over several weeks, allowing the upper sprouts time to grow.
- For the best flavor, wait until after the first frost to harvest, as cold weather sweetens the sprouts.
How to Store Brussels Sprouts
- Fresh Storage: Keep harvested sprouts in the refrigerator for up to 2 weeks.
- Freezing: Blanch the sprouts in boiling water for 3 minutes, then transfer to ice water. Store in freezer bags for up to 12 months.
Bonus Tips for Growing Brussels Sprouts Successfully
- Companion Planting: Grow Brussels sprouts with onions, garlic, or marigolds to repel pests.
- Regular Inspection: Check your plants regularly for signs of pests or disease.
- Patience Is Key: Brussels sprouts take time to mature—expect to wait 3-4 months for a full harvest.
Growing your own Brussels sprouts is a rewarding experience that requires patience, care, and the right timing.